


Amazing Traditional Bottle painting ideas.
Hello folks! Welcome back to Smruti’s Art corner. Transforming glass bottle into artistic ones is my passion. Every time I try different art on bottles. This time I have tried Rajasthani art on glass bottle and it turned out marvelously. Traditional decorative showpiece always looks beautiful and gives a regal touch to your home. Fine and intricate design highlighted by using fevicryl 3d outliner which enhances its beauty. This beautiful décor of true Indian art always would be the great gifting option for Indian art lovers.
Let’s take a look what material I have used for bottle painting:
- Chalk paint
- Elephant printed paper
- Acrylic colors
- 3D outliners
- Dot painting tools
All above material is easily available in market or you can buy online. In this project I have used homemade chalk paint.
How to make chalk paint?
You just need 3 ingredients to make chalk paint at home.
1.Plaster of paris or baby powder
2.Acrylic color
3.Water.
Take 1 table spoon of plaster of paris or baby powder and 2 tablespoon of acrylic color. Mix both the ingredients nicely and then add ½ table spoon of water to form proper consistency. You can store this chalk paint for 2 to 3 months, plaster of paris doesn’t dry.
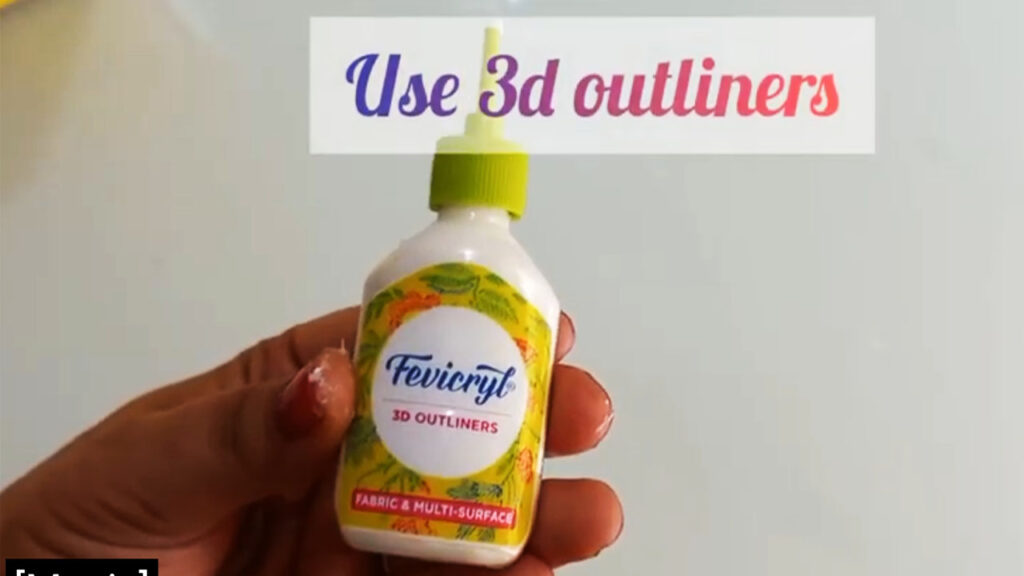
I have used Fevicryl 3D outlines to highlight the intricate design on bottle. With 3d outliner you can create patterns to highlight designs painted on any surface. These 3d outliners are perfect to create beautiful outlines on glass, fabric, paper and wood and clay pot. 3d outliners are easily available in market but you can also make it at home.
How to make 3D outliners at home?
Material required: Acrylic colors, fevicol, and baby powder.
To make 3d outliner I have used baby powder and fevicol in equal quantity. You can use any brand of baby powder. Mix both ingredients nicely to form proper consistency. Mix acrylic color as per your choice. Take any plastic square shape cutout to make a cone. Fill the color in the cone and seal it properly. Your homemade 3d outliner is ready. Now you can use it on any surface. Make sure that cone is sealed properly so that it will not dry.
Watch complete video tutorial how to make 3d outliners.

Before we start painting the bottles, let me clear some doubts with some FAQ’s.
Which paint is used for bottle painting?
Acrylic colors are best choice for bottle painting. You can use chalk paint or spray paint also.
How do you start a bottle painting?
Step 1: Remove the labels. Before you start painting the bottles, you need to remove labels on bottles. The best way to remove label is to immerse them in lukewarm water for an hour and they will come out easily.
Step 2: selection of paint. Choose any color for painting. Acrylic colors are best choice to paint the bottle. Acrylic color doesn’t take much time to dry. If you are planning to do decoupage on bottles then you should go with chalk paint. You can use spray paint also.
Amazing Traditional Bottle painting ideas. Let’s Start bottle painting-
Step 1:

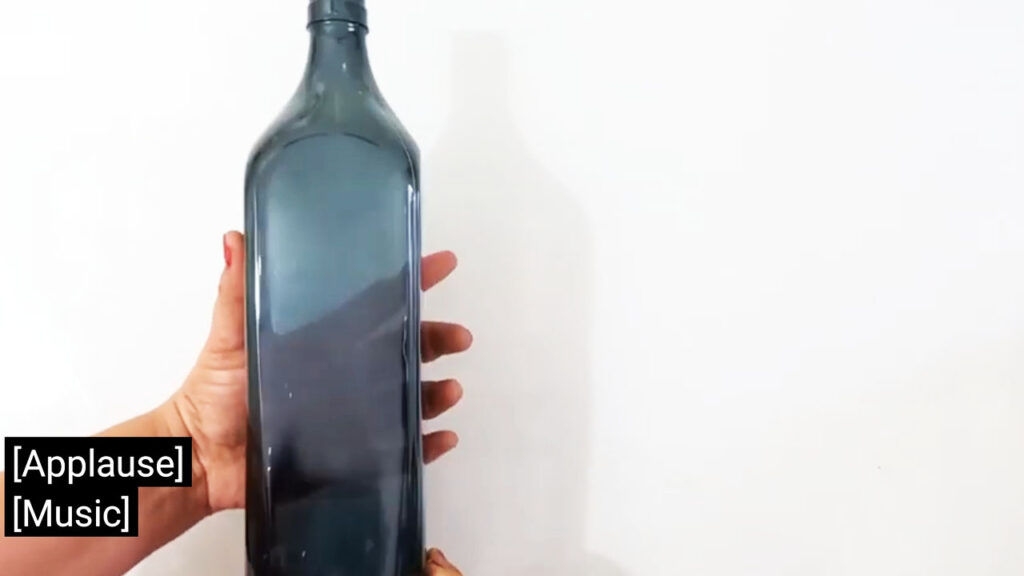
It’s very important to clean the bottle before you start painting it. Let’s see how to clean the bottle.
1: Start by soaking the bottles in lukewarm water.
2: After a good soaking the bottle labels should be ready to peel off. Remove the lable.
3: Time to start coloring!
Step 2:
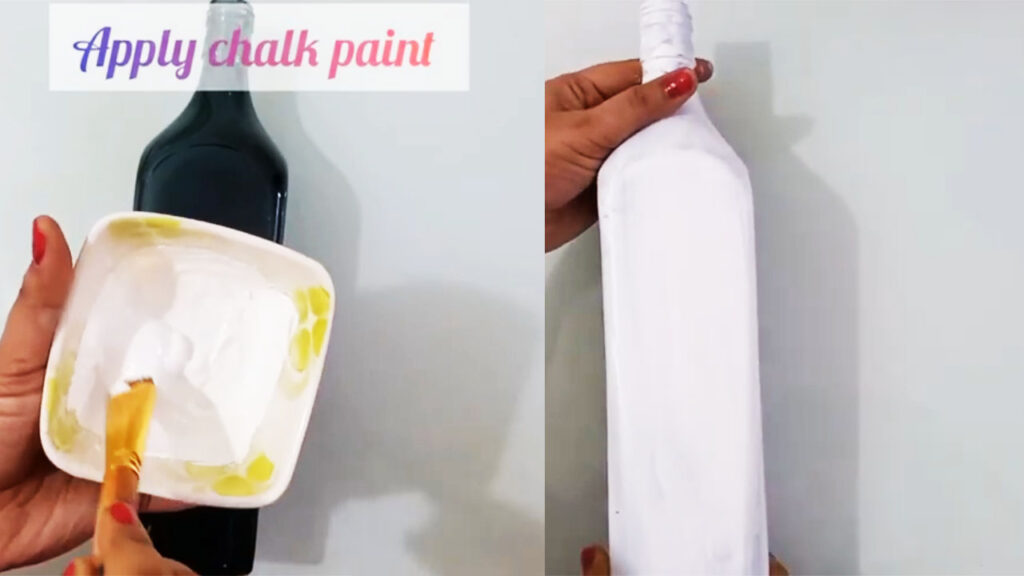
Apply chalk paint on bottle and let it dry. So if there is option of acrylic paints then why to use chalk paint?
Here is the answer- A decorative paint known for its matte, chalky appearance, chalk paint is a popular choice for giving furniture and home décor a rustic, vintage, or shabby-chic style. Because it can easily be given a distressed look, chalk paint is ideal for those who want to add character and vintage charm to their home. Chalk paint is most often used to give pieces of furniture a matte look.
Step 3:
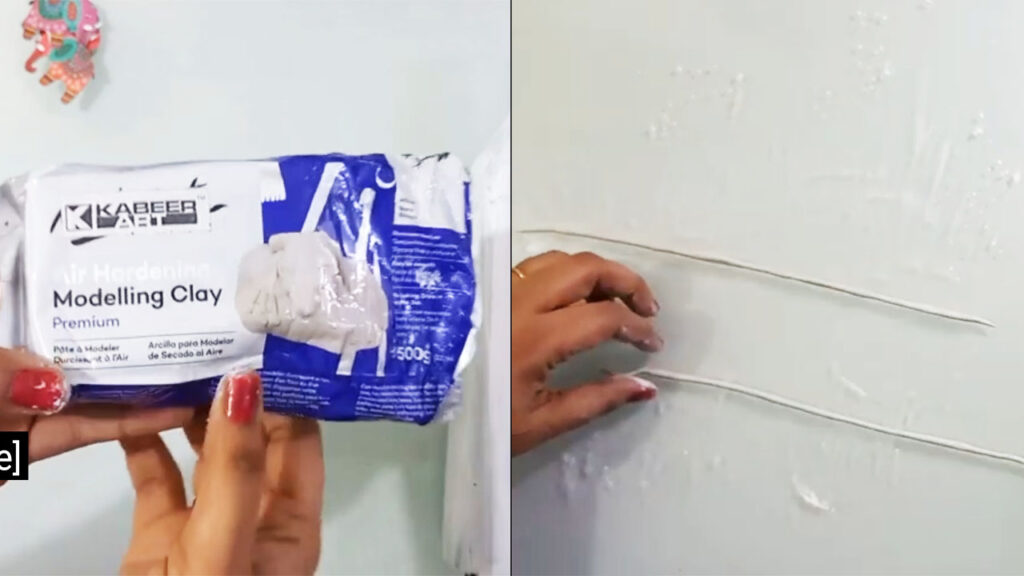
So there are different clay options with which you can do clay work on bottle. I have used air dry modeling clay. Instead of modeling clay you can use fevicryl mouldit clay also. So before you start working with clay, always apply oil on your palms to avoid stickiness. Make long and thin rolls of modeling clay.
Step 4:

Apply glue on all corners of bottle and stick the clay rolls.
Step 5:
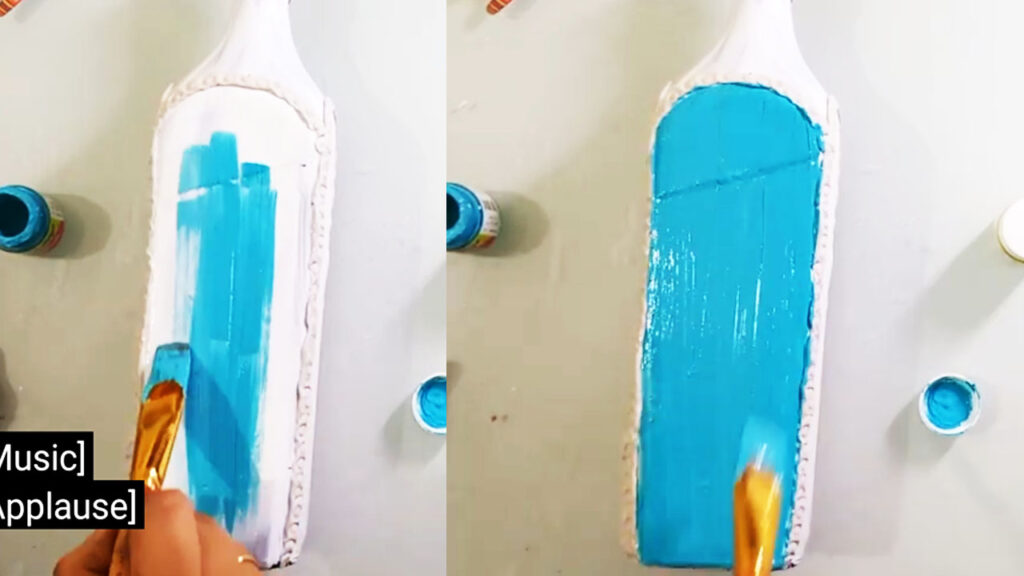
Now apply any acrylic color on the bottle as per your choice. I chose teal blue and yellow color.
Step 6:
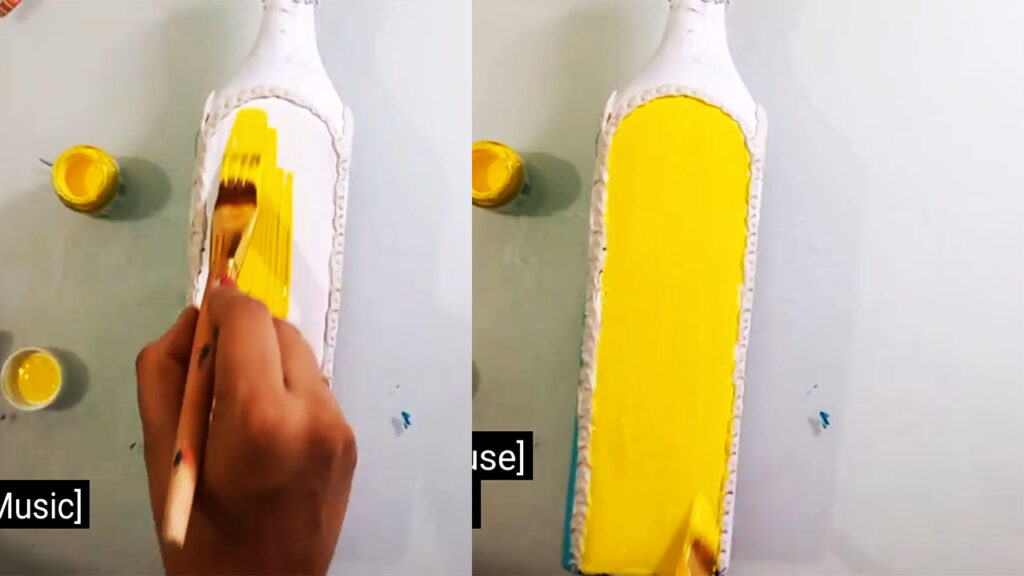
Color combination is completely your choice. I chose yellow and teal blue because contrast they looks perfect.
Step 7:
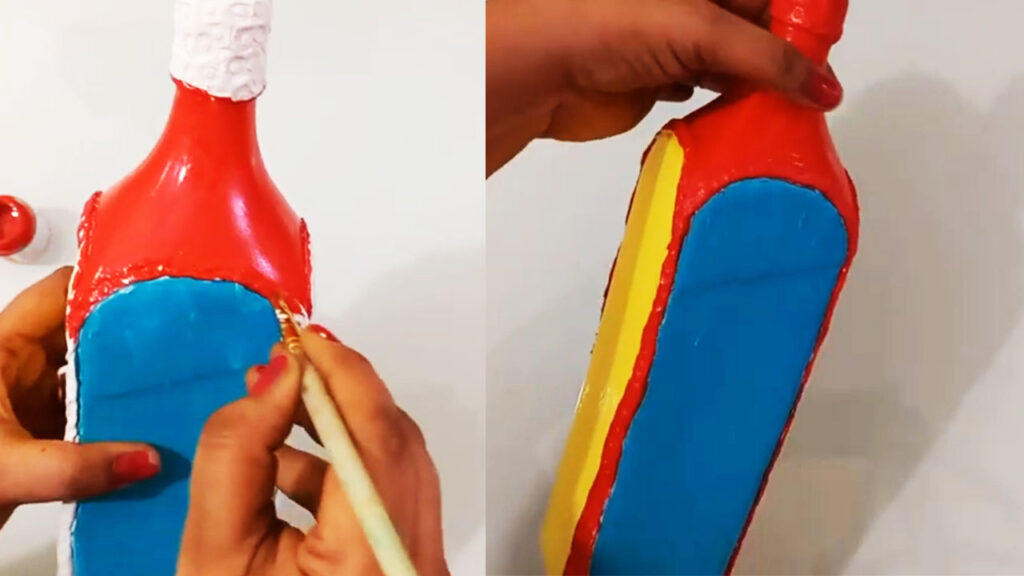
Apply red color on the top side and corners.
Step 8:
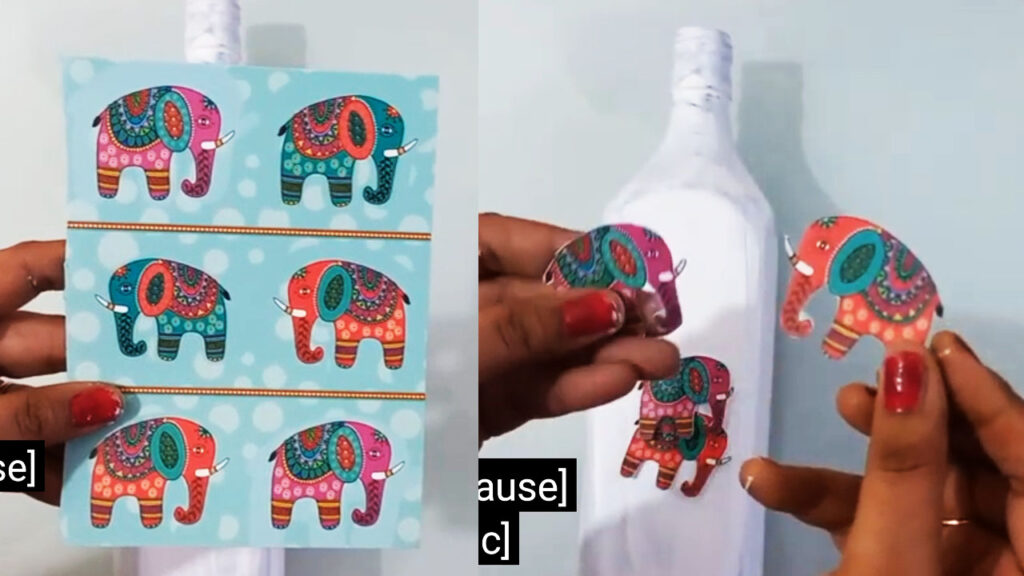
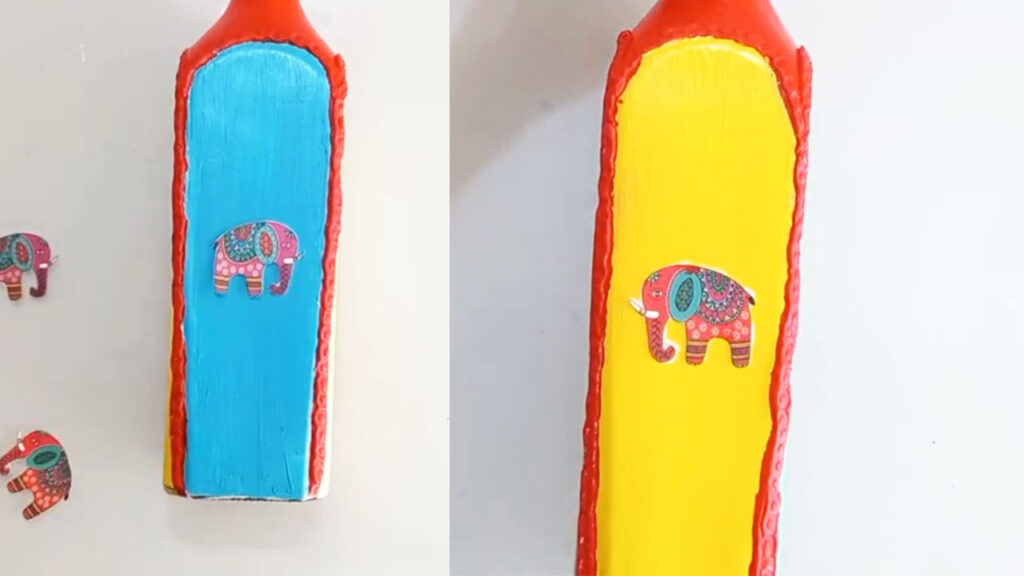
I had some printed paper with different design. But I choose elephant print because I wanted to make some traditional art on bottle. I make 4 cutouts of elephant design to stick them on all 4 sides of bottle.
Step 9:
Stick cutouts on the bottle.
Step 10:
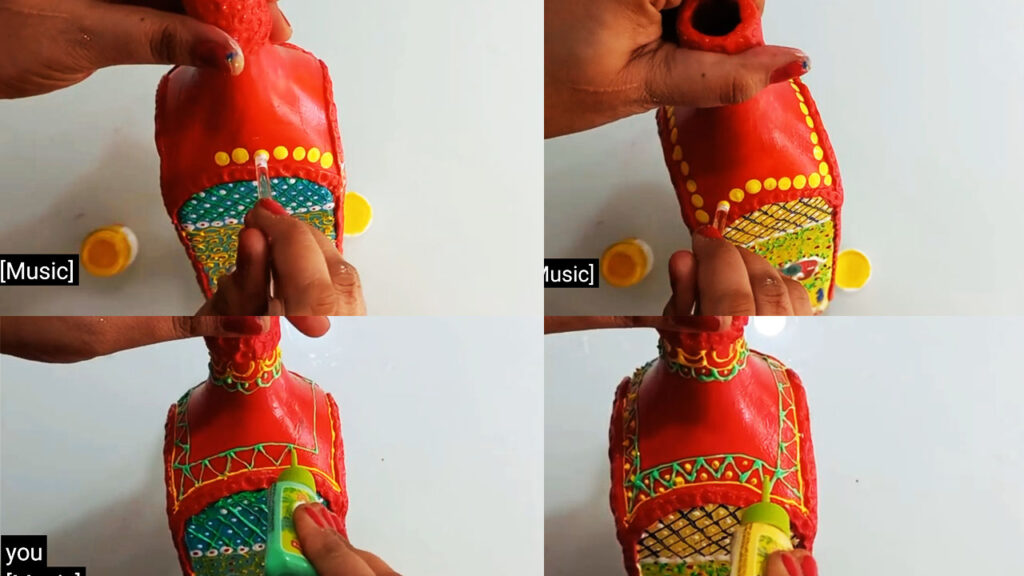
I have used the outliners to trace the outline of the designs.
What is the use of 3D outliner?
Fevicryl 3D Outliners are wash proof and quick drying. Available in vibrant colors, use the outliners to trace or outline designs or to fill in colors. Long narrow nozzle allows for superb outlining and raised patterns.
With 3d outliner you can create patterns to highlight designs painted on any surface. These 3d outliners are perfect to create beautiful outlines on glass, fabric, paper and wood and clay pot. You can also make these outliners at home.
With only 3 ingredients you can make 3d outliners at home: Acrylic colors, fevicol, and baby powder.
Step 1- To make 3d outliner I have used baby powder and fevicol in equal quantity. You can use any brand of baby powder. Mix both ingredients nicely to form proper consistency.
Step 2- Mix acrylic color as per your choice.
Step 3- Take any plastic square shape cutout to make a cone. Fill the color in the cone and seal it properly.
Step 4- Your homemade 3d outliner is ready. Now you can use it on any surface. Make sure that cone is sealed properly so that it will not dry.
Step 11:
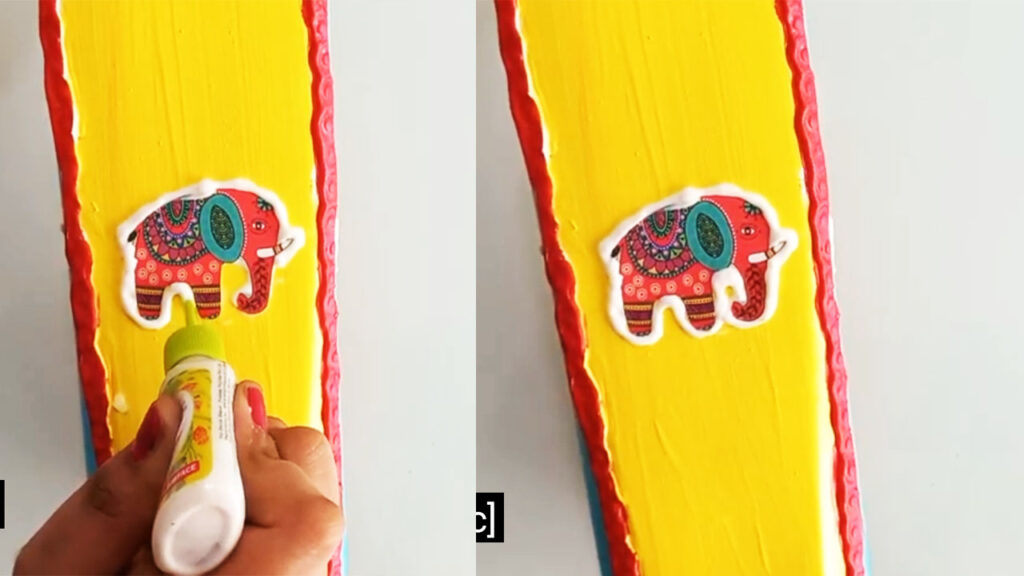
Start tracing the design with 3d outliners. I have started making outline on elephant’s cutouts.
Step 12:
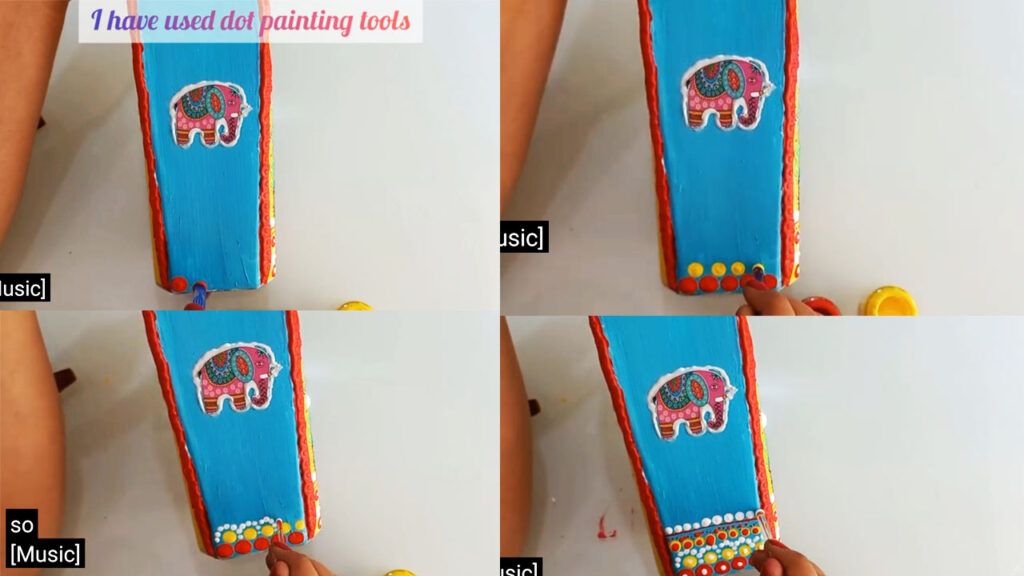
Now you can start drawing designs on bottle. I have used dot painting tools to make dots on bottle. Now its completely optional to use dot painting tools. If you don’t have dot painting tools you can use thin brush to draw design on bottle. You can decorate the bottle the way you want. You can choose any color as per your choice that suits to your bottle background color.
Step 13:
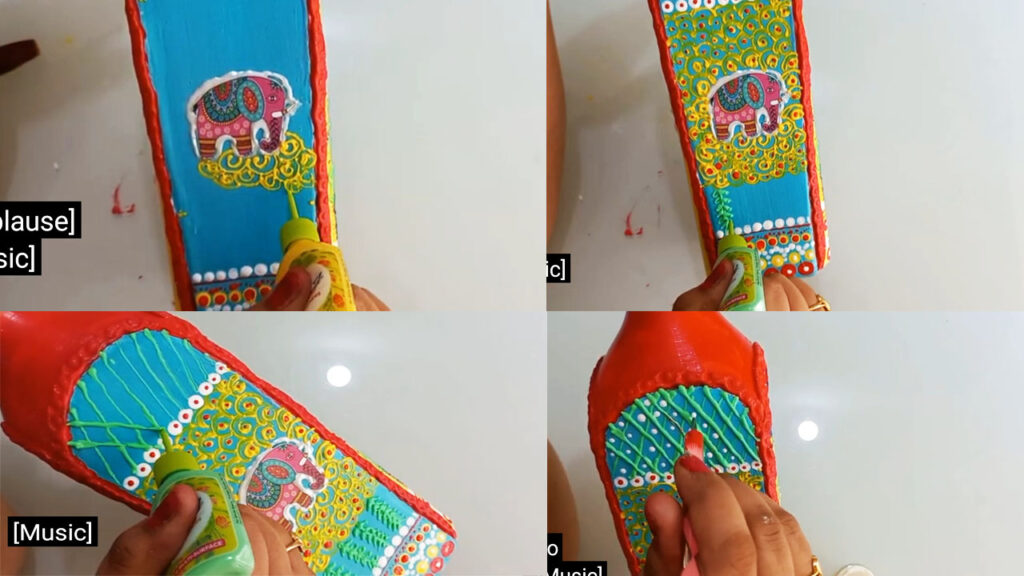
I simply wanted to make the design 3d and more attractive, so that again I have used 3d outliners to draw designs and patterns. Many colors are available in Fevicryl 3doutliners. The colors are crafted in a manner such that once applied on the surface it quickly dries off and becomes dense and brilliant once completely dry.
Step 14:
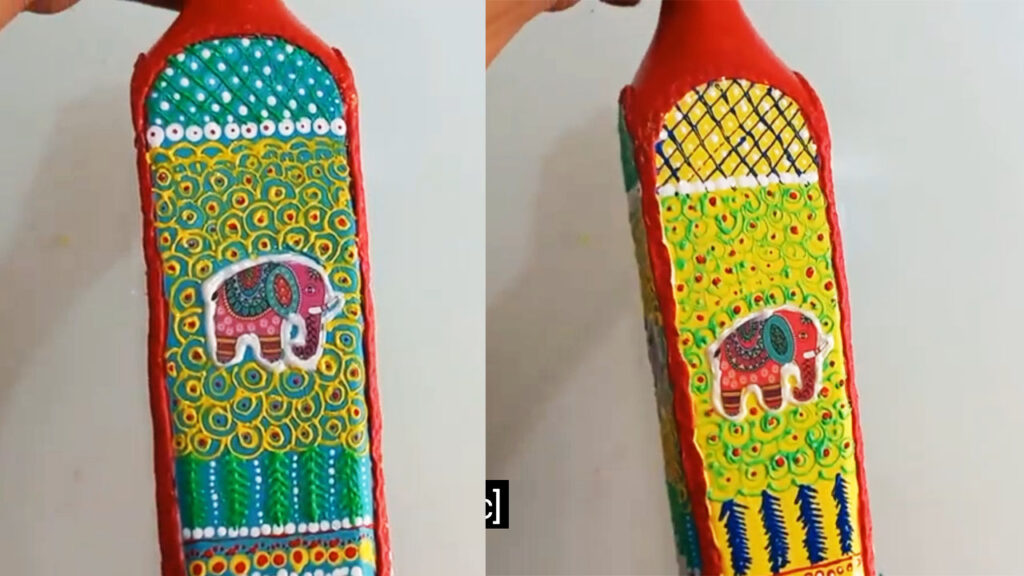
Patterns made using 3d outliners are dried now and looking beautiful.
Step 15:
On the top portion of the bottle I was thing to draw design with 3d outliners but then I dropped the plan, because later I thought I would look messy after using 3d outliners. Rest bottle I finished with intricate design so the top part of the bottle decorated simply with dot painting.
Step 16:
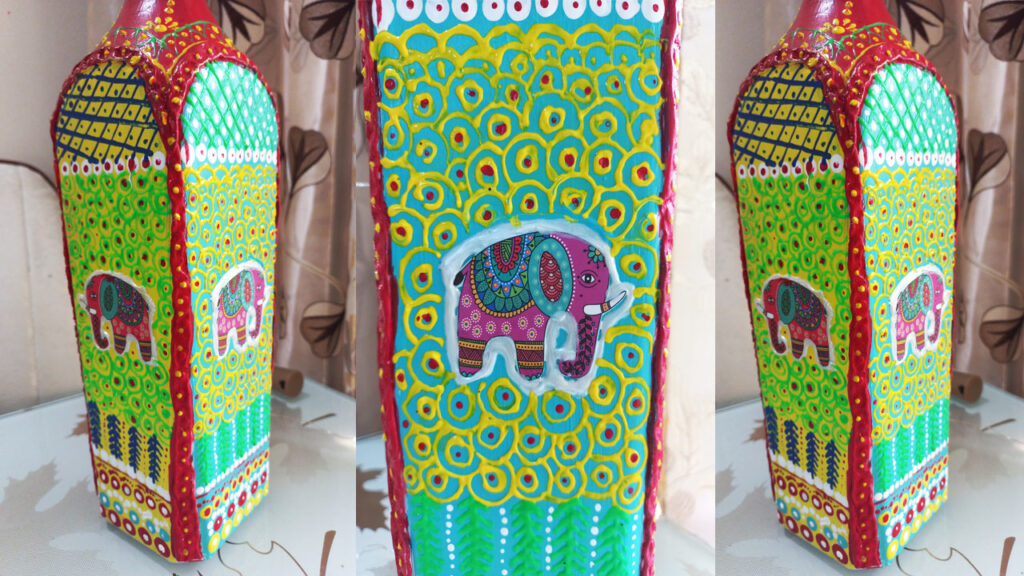
This is the final satisfactory look of the bottle. Transforming glass bottles into artistic one is my passion and this traditional art on the bottle is one of my favorite piece. I hope this tutorial will help you if you are going to try this art on bottle as I have shown you how to do it in very simple steps. Let me know your reviews in comment box and do not forget to share and like if you like this bottle art.
Thank you!
Watch complete video tutorial.

I have uploaded few articles on how to paint and decorate glass bottle with different technique.
For more bottle art you can read my other article and watch videos.
Here I am sharing very easy and amazing decoupage bottle tutorial with you all. I have decorated this bottle with sea she and pearls.

Thinking to decorate your center table with some antique vase? I have best idea that undeniably will help you. I personally like terracotta pots/vase for home décor. I believe placing them to any space will raise beauty of that space. You can put your own creativity on terracotta vase according to the color of your walls, sofa, and furniture.
Now you do not have to get rid of your wine bottles by recycling them. I have amazing, easy and simple ideas that you can do with less effort. Painting and decorating wine bottle can be one of the most enjoyable things to do. You can attempt and combine the thoughts to come up with assorted blends of color and design. Spice up your home with these attractive pieces to make your space vivacious and wonderful.


Excellent post. I used to be checking constantly this weblog and
I’m inspired! Very helpful info particularly the last part 🙂 I handle such info much.
I was looking for this particular information for a very long time.
Thank you and best of luck.
Thank you so much
I always emailed this weblog post page to all my
friends, for the reason that if like to read it next my friends
will too.
thank you so much