


How to make Key holder at home
Hello friends welcome back to Smruti’s Art corner. I made so many crafts till now to decorate my home. But this time, I made something which is useful home décor. I made a key holder. The attractive design and eye catching colors of key holder are enhancing its beauty. Key holders are useful, practically in almost everyday life. If you are thinking to gift someone then it would be best gift idea you are looking for.
Why we need a key holder? Key holder helps to organize all your important keys in one place within your eye sight. Other than its main purpose it also adds an aesthetic dimension to your wall. House keys are small objects that can cause problems if they disappear. DIY key holder ideas help you to keep your keys at one place and safe. These holders can also work as simple decorations, especially when placed near the entryway. The best thing is that there are many ways you can make it buy your own with very less effort. You can simply make it by attaching small hooks and sticking the slab near the entryway will do the trick. Or if you are creative like me then you should definitely make it in creative way. I made this key holder using very few supplies. This is my favorite craft because when I started making it I didn’t knew that it will turn out so nicely. Cute birds sitting on branch really enhances beauty of key holder and it is looking stunning.
Let’s take a look how I made it.
Material used to make Key holder at home:
- Mdf board round shape
(You can use hard cardboard instead of mdf board)
- Ice-cream sticks
- Twine
- 3D outliners
- Hooks for hanging keys.
Step 1: How to make key holder at home

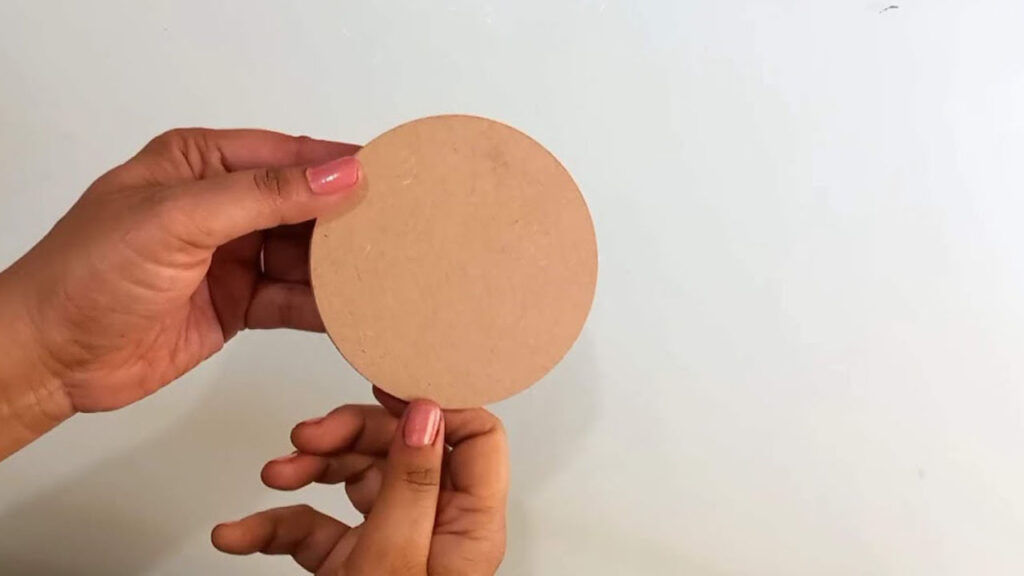
Very first step is to decide the base for your craft. I used mdf board as a base for the key holder. I brought some mdf of different shape and sizes from “itsy bitsy” store. MDF boards are available online also. If you don’t want to buy mdf board then you can use hard cardboard. I will suggest using mdf board because they are durable. If you choose cardboard then make sure it is strong enough, can handle the weight of keys. Or you can use 2 cardboard cutouts and stick them together and then make key holder out of it.
Step 2:
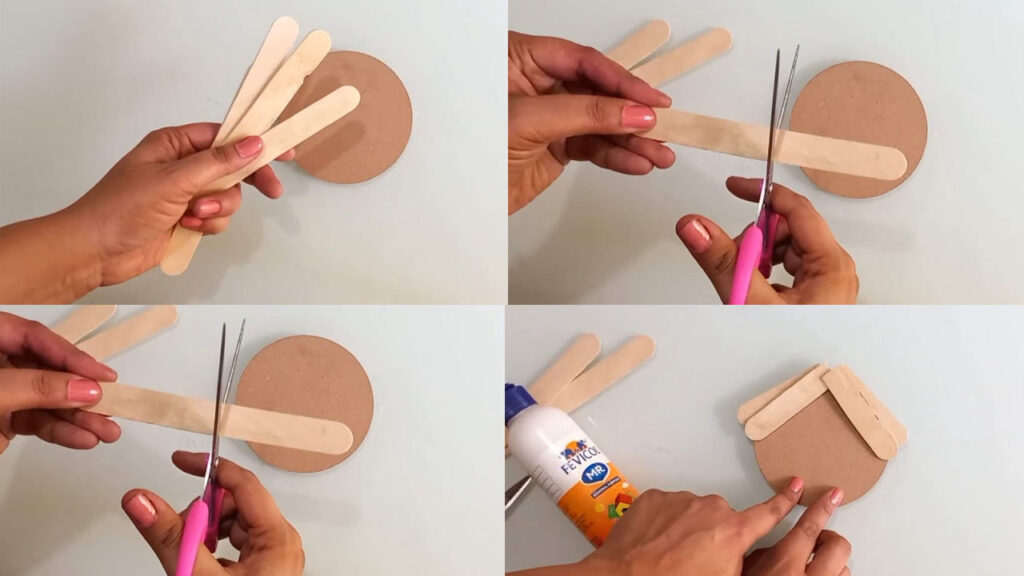
To make bird house I have used ice-cream sticks. Take ice-cream sticks and cut them into half. Make 4 pieces of ice-cream sticks and stick them on mdf boars.
Step 3:
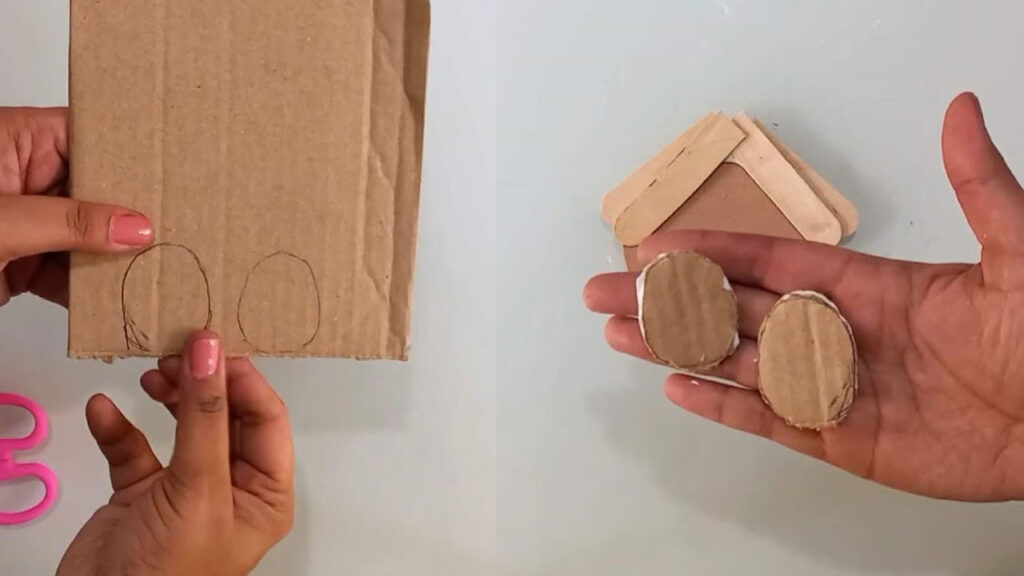
To make birds I have used cardboard. Cut the cardboard in 2 small oval shaped to make the birds.
Step 4:
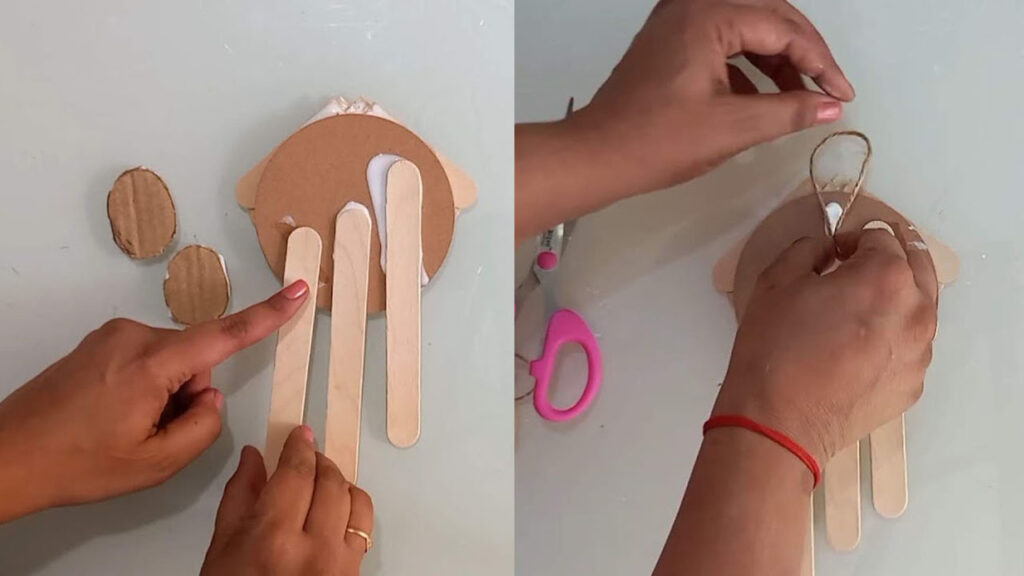
Now we need strong base to stick hooks on it, so that it can carry the weight of keys easily. I found ice-cream sticks are the best option on which we can stick hooks. Stick ice-cream sticks on back side of mdf board. To hang the key holder, I have attached twine on the backside of key holder.
Step 5:
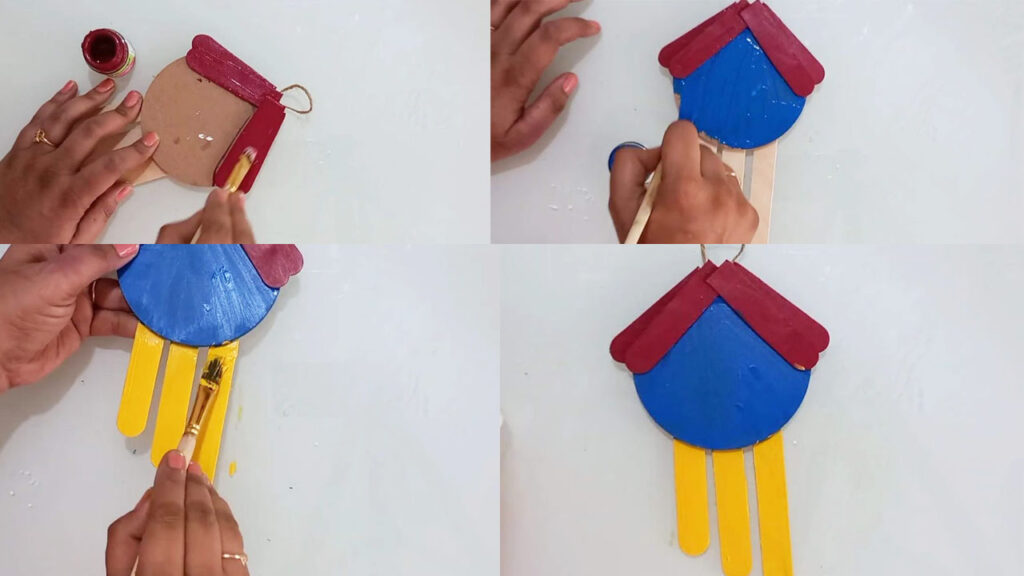
Start coloring now. You can color the key holder as per your choice. I wanted to make it colorful bird house. So I colored the bird house with blue, red and yellow color.
Step 6:
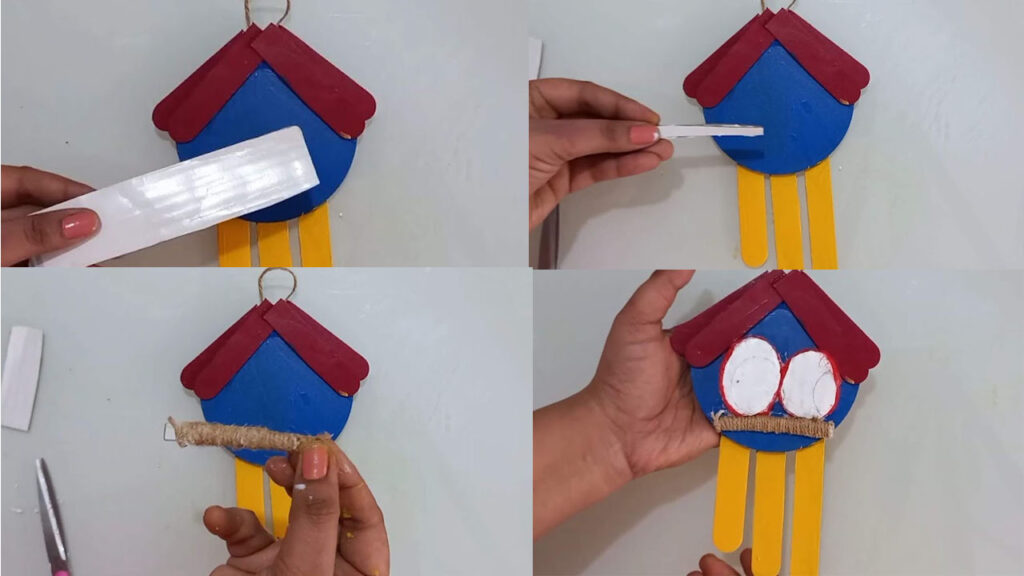
First I wanted to make small window and door on that key holder to make birds house. But due to space constraint, I decided to make a branch and fixed birds on it. To make a branch, I took small piece of cardboard and wrapped it with twine.
Step 7:
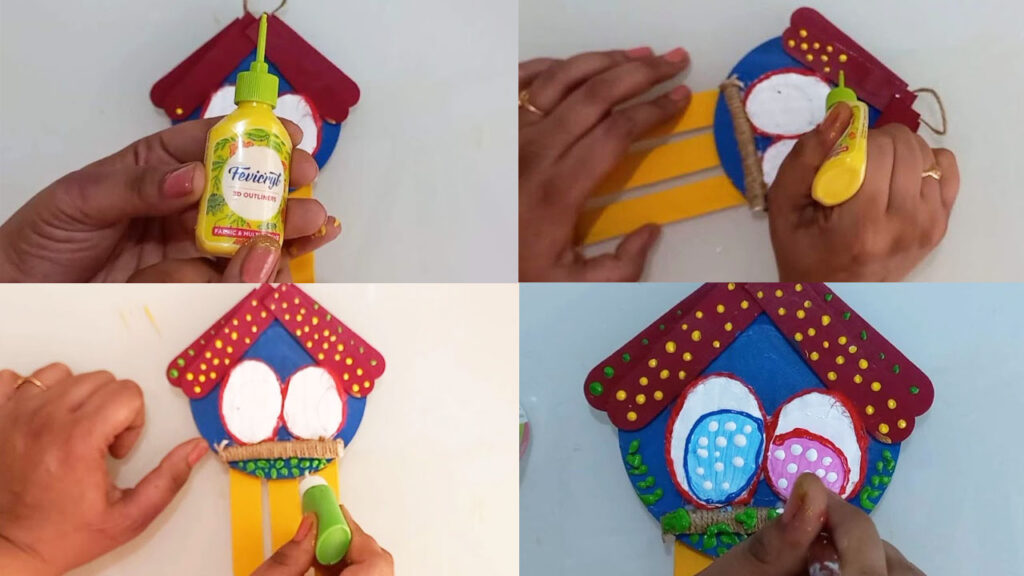
I have used Fevicryl 3D outlines to highlight the design on key holder. With 3d outliner you can create patterns to highlight designs painted on any surface. These 3d outliners are perfect to create beautiful outlines on glass, fabric, paper and wood and clay pot. 3D outliners are easily available in market but you can also make it at home.
How to make 3D outliners at home?
Material required: Acrylic colors, fevicol, and baby powder.
To make 3d outliner I have used baby powder and fevicol in equal quantity. You can use any brand of baby powder. Mix both ingredients nicely to form proper consistency. Mix acrylic color as per your choice. Take any plastic square shape cutout to make a cone. Fill the color in the cone and seal it properly. Your homemade 3d outliner is ready. Now you can use it on any surface. Make sure that cone is sealed properly so that it will not dry.
If you are not sure, you can make 3D outliner at home then you can also buy Fevicryl 3D outliners online.
- Non-Hazardous and harmless– The best part is kids also can use these 3d outliners for their art project or to make any craft because fevicryl 3D Outliners are non-toxic and safe for children. Anyone can use these outliners.
- Easy to apply & dries easily – The best part of using fevicryl 3d outliner is it easy to use, dries quickly and water-resistant. Fevicryl 3d outliners are available in every color. These 3d outliners are designed in such a way so that long narrow nozzle helps to draw patters and outline with very fine touch.
- Can be used on any surface – 3d Outliners are very useful if you want to create patterns on any surface. You can use these 3d outliners on any surface such as glass, fabric, paper, wood, and marbles or on clay pots etc.
- Makes your project a masterwork- It doesn’t matter whether you are crafty professional or using it for the very first time, you can bring a new life to any object by just using 3d outliners by decorating it. You can make any surface your masterpiece whether it is canvas, fabric, clay pots, terracotta, wooden vase or anything.
Step 8:
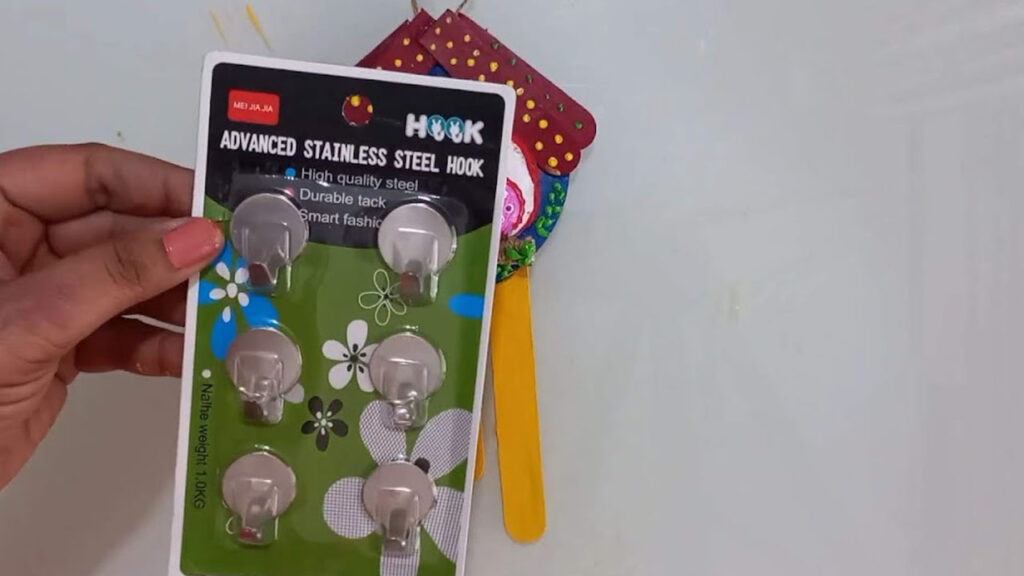
Be ready with the hooks. I have selected simple hooks for this key holder.
Step 9:
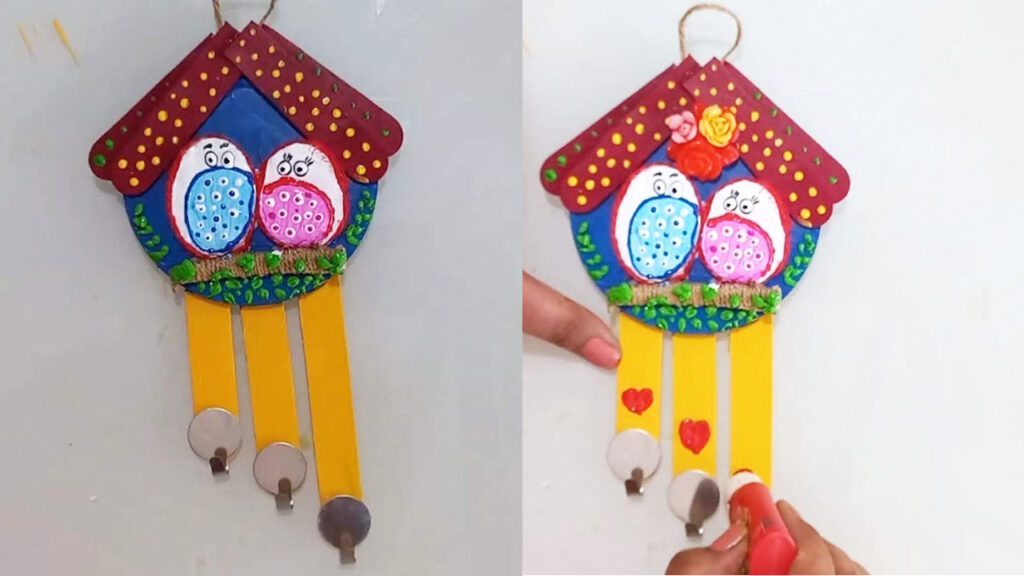
You can decorate the remaining part as per your choice. I made heart shape designs on ice-cream sticks. Let it dry completely.
Step 10:
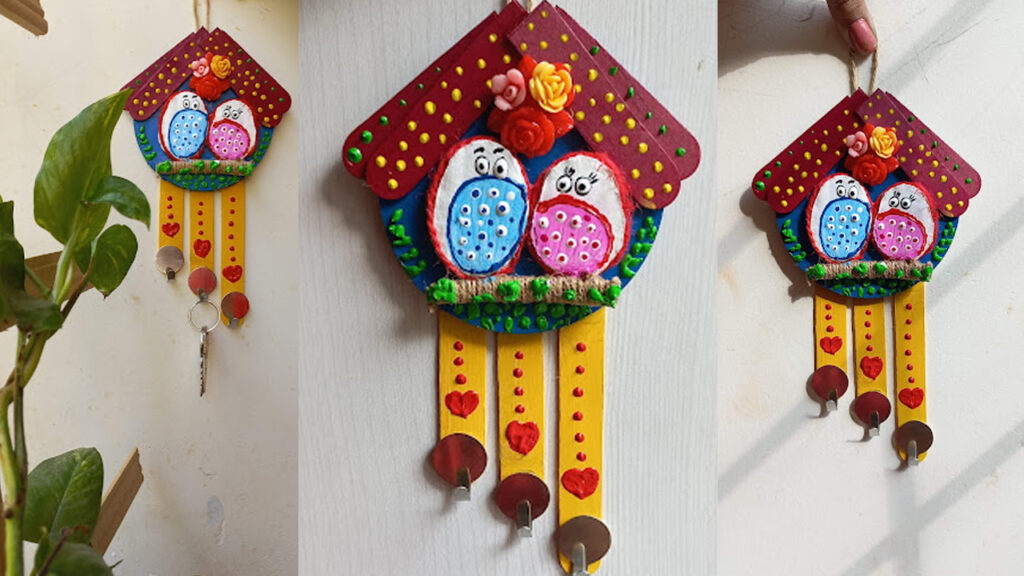
And beautiful key holder is ready. You can use to organize keys, mask, scarf, light weight things. I hope you enjoyed reading this article.
Thank you!!
Watch complete video tutorial here.

In most of my projects I have used 3D outliners. If you want to check more ideas with 3d outliners then you can go through related article give below.
Traditional decorative showpiece always looks beautiful and gives a regal touch to your home. Fine and intricate design highlighted by using fevicryl 3d outliner which enhances its beauty. This beautiful décor of true Indian art always would be the great gifting option for Indian art lovers.
The door’s hangings are very easy to put as well as take down, and do not touch your wall/door. It is a traditional item made from fabric, wood, mirrors and decorative materials. But I tried to make it using cardboard, mirrors, 3d outliners, bangles and some decorative materials. I have used bright and poppy colors to color the elephants which enhances its beauty and complements your wall color. This wall décor gives a royal touch to your home and would be a nice gift item for Indian art lovers.
This wall décor is very is to make with material that are easily available at home. You can definitely try this colorful birds hanging wall décor and place it on your favorite wall.
Jewelry boxes are thoughtful gifts for women and girls. If you are thinking of giving something handmade to your close one, this gift box would be the perfect option that you should definitely try. It can be one an uncommon gift for women and girls. I have given you an idea in my tutorial about how you can make this antique box.

Despite of all these decorative items I made some useful craft which we use in our daily life. It’s my hobby, my passion. “Luxury, to me, is not about buying expensive things; it’s about creating it by your own imagination”. I made Craft that are useful in daily life such as- Essence stick holder, key holder, tray, Shubha labha door hanging, toran and many more. I try to use supplies which are easily available at home or in market to make all these craft. Just take a look at all those DIY projects which are useful in daily life and the best part you can make it by yourself.


